In the captivating realm of digital imagery, where pixels give life to our visual stories, there exists a hidden art form known as “image convolution.” It’s the wizardry behind transforming ordinary photographs into stunning masterpieces, turning simple snapshots into scenes of enchantment.
Imagine having the power to bring your images into sharp focus, emphasizing the subject while gracefully blurring the background. This enchanting effect, known as “bokeh,” has the ability to elevate your photography to a new level of artistry. And at the heart of this magic lies the technique of image convolution.
In this blog, we’ll embark on a journey to demystify the process of image convolution step by step. We’ll unravel the core principles, explore the mathematics, and, most importantly, demonstrate how this magic is brought to life. With the help of Python and C++, we’ll not only understand the science behind image convolution but also wield its power to create captivating bokeh effects.
So, whether you’re an aspiring photographer, a tech enthusiast, or simply someone curious about the art and science of image manipulation, join us on this visual adventure. By the end of this blog, you’ll not only comprehend the intricacies of image convolution but also be able to wield it as your creative tool, turning every photo into a work of art. Welcome to “Image Convolution: Bokeh in Focus.” Let the journey begin.
Table of Contents
Understanding Image Convolution
Image convolution begins with the notion that every image can be represented as a grid of tiny picture elements, better known as pixels. Each pixel carries information about the color and brightness of a specific point in the image. The magic of convolution lies in its ability to manipulate these pixels to create striking visual effects.
Convolutional Kernels: The Heart of the Process
Central to image convolution are convolutional kernels, small grids of numbers that act as templates. These kernels are designed with specific patterns and characteristics to achieve various image-processing goals. As the kernel slides over the image, it interacts with the pixel values, transforming them according to the kernel’s design.
The Role of Convolutional Kernels
Convolutional kernels play different roles depending on their design. Some enhance edges, making them more pronounced, while others blur the image, creating a soft and dreamy effect. Kernels can also emphasize certain image features or even extract information like edges, textures, or patterns.
Visualizing the Convolution Process
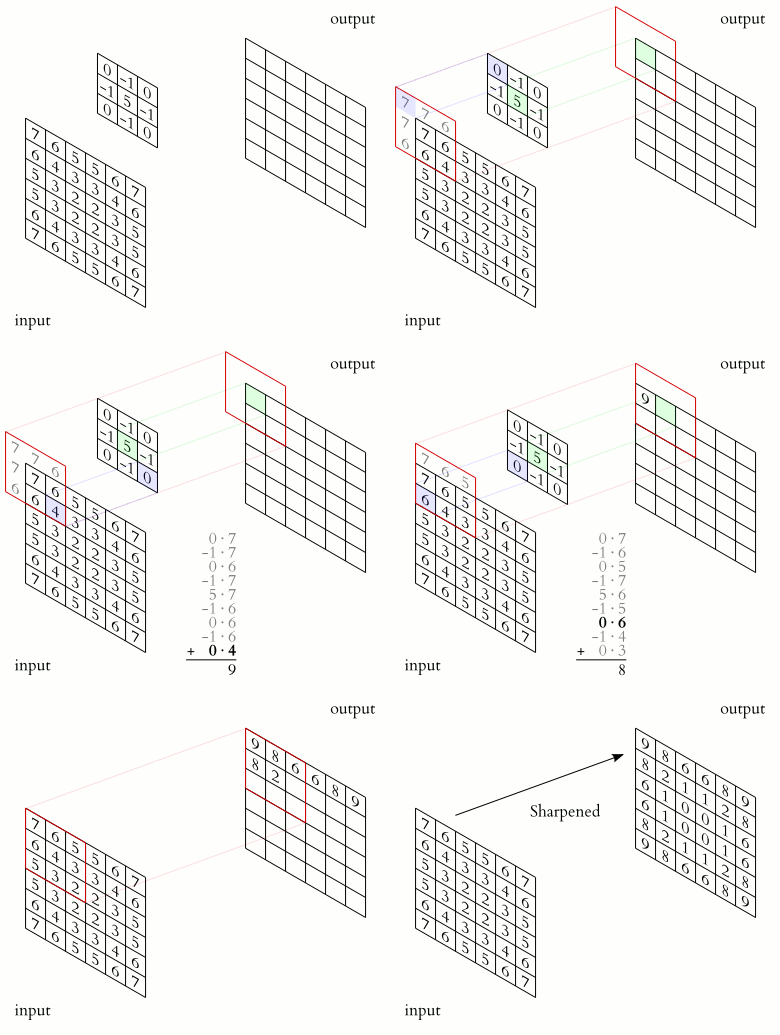
To grasp the concept more intuitively, imagine placing a translucent grid over an image. Each cell of the grid corresponds to a value in the convolutional kernel. As you move the grid across the image, you multiply the pixel values in the overlapping region with the values in the kernel. The result of this mathematical operation becomes the new pixel value in the transformed image.
This process continues for every pixel in the image, systematically altering its appearance based on the convolutional kernel’s influence. The collective effect of these transformations gives birth to visually captivating outcomes, such as the coveted bokeh effect.
In essence, image convolution is the art of pixel-level manipulation, and convolutional kernels are the brushes that painters use to craft their masterpieces. With a firm grasp of this core concept, we’re now ready to delve deeper into the practical application of convolution, where we’ll unveil the secrets of creating the enchanting bokeh effect.
The Convolution Process
Now that we’ve laid the foundation by understanding the fundamentals of image convolution, let’s delve deeper into the very core of this mathematical operation. Convolution, in essence, is a precise mathematical process that involves the merging of two functions to produce a third. In our context, these functions are the image and the convolutional kernel, and the result is the transformed image with the bokeh effect.
The Mathematical Representation
Here, (f∗g)(x,y) represents the convolution of two functions f and g at a specific point (x,y). The convolution is calculated by summing up the product of the values of f and g at all possible relative positions (i,j).
Understanding the Convolution Process
- Element-wise Multiplication: At its core, convolution is about element-wise multiplication. The kernel “slides” over the image, and at each position, it performs a pixel-wise multiplication between the image and the kernel.
- Accumulation of Values: The results of these multiplications are then accumulated or summed up. This summation represents the new pixel value at the same position in the transformed image.
- Moving the Kernel: The kernel continues to slide across the image, repeating the multiplication and summation process for each pixel until it covers the entire image. This is where the convolution operation derives its name—the kernel “convolves” over the image.
- Boundary Considerations: For pixels near the image’s edges, adjustments need to be made to ensure that the convolution operation remains well-defined. Various methods, such as zero-padding or mirroring, are employed to address these boundary issues.
The Power of Convolution
Convolution, as a mathematical operation, possesses remarkable versatility. Its ability to extract information, enhance features, and create visual effects like bokeh is a testament to its utility in image processing. When we apply a convolutional kernel designed for the bokeh effect, we selectively blur the background of an image while keeping the subject in sharp focus—a technique that elevates photography and visual storytelling.
In the upcoming sections, we will witness the convolution process in action as we create the bokeh effect using both Python and C++. By mastering this mathematical art, we unlock the potential to transform our visual narratives into captivating masterpieces.
Code Walkthrough
Defining the Convolution Function
The heart of many image processing techniques, including the creation of depth-based effects like the Depth of Field (DOF) bokeh effect, lies in the convolution operation. Convolution serves as the fundamental building block for applying filters, blurs, and various other operations to images. In this section, we will delve into the intricacies of designing a custom convolution function. Our journey will encompass both Python and C++ implementations, each tailored to harness the unique strengths of the respective programming languages.
Python Implementation
Creating a custom convolution function from the ground up requires attention to detail and an understanding of the underlying mathematics. In Python, this journey unfolds in the following stages:
- Initialization: To initiate our voyage, we first ascertain the dimensions of the kernel, representing our filter’s shape. The kernel’s height and width dictate the convolution’s behavior. We calculate the padding height and width required to accommodate the kernel’s dimensions.
- Input Image Dimensions: We determine the dimensions of the input image, as these will be essential for traversing and processing the image.
- Output Image: The output image—a canvas awaiting the convolution’s artistic touch—is initialized as an empty image with dimensions akin to the input image.
- Convolution Operation: The core of the custom convolution function lies in a series of nested loops that traverse the input image. For each pixel in the input image, we apply the convolution operation across all color channels (typically Red, Green, and Blue).
- Resultant Image: The journey concludes with the presentation of the resultant image—a masterpiece meticulously crafted through convolution.
#Define a custom convolution function
def custom_convolution(input_image, kernel):
    kernel_height, kernel_width = kernel.shape
    padding_height = kernel_height // 2
    padding_width = kernel_width // 2

    # Get the dimensions of the input image
    image_height, image_width, channels = input_image.shape

    # Create an empty output image
    output_image = np.zeros_like(input_image)

    # Perform convolution for each color channel
    for channel in range(channels):
        for i in range(padding_height, image_height - padding_height):
            for j in range(padding_width, image_width - padding_width):
                sum_color = 0
                for m in range(-padding_height, padding_height + 1):
                    for n in range(-padding_width, padding_width + 1):
                        sum_color += input_image[i + m, j + n, channel] * kernel[m + padding_height, n + padding_width]
                output_image[i, j, channel] = np.uint8(sum_color)

return output_imageIn this Python implementation, we define `custom_convolution` to perform convolution on an input image using a given kernel. The function takes into account the padding required to ensure that the output image has the same dimensions as the input.
C++ Implementation
Transitioning to the realm of C++, we tailor our custom convolution function to harness the efficiency and power offered by this programming language. Our step-by-step guide through the C++ implementation proceeds as follows:
- Initialization: We commence our odyssey by discerning the kernel’s dimensions and, subsequently, the padding requirements. These values hold the key to the convolution’s spatial extent.
- Padding Height and Width: Padding height and width are essential for accommodating the kernel’s dimensions. They are computed as half of the kernel’s height and width, respectively.
- Input Image Dimensions: We ascertain the dimensions of the input image—information that is indispensable for traversing and applying convolution.
- Output Image: Just as in our Python counterpart, we initialize an output image, an empty canvas poised to bear the convolution’s mark. This output image possesses the same dimensions as the input image.
- Convolution Operation: The core convolution operation unfolds through nested loops, much like in Python. These loops iterate over each pixel in the input image, applying the convolution across all color channels (Blue, Green, and Red).
- Resultant Image: At the conclusion of this arduous journey through convolution, we are presented with the resultant image—an image transformed through the convolution operation.
// Define an optimized convolution function for color images
void convolution(const cv::Mat& inputImage, const std::vector<std::vector<std::vector<double>>>& kernel, cv::Mat& outputImage) {
    int kernelHeight = kernel.size();
    int kernelWidth = kernel[0].size();
    int paddingHeight = kernelHeight / 2;
    int paddingWidth = kernelWidth / 2;

    // Add padding to the input image
    cv::Mat paddedImage;
    cv::copyMakeBorder(inputImage, paddedImage, paddingHeight, paddingHeight, paddingWidth, paddingWidth, cv::BORDER_CONSTANT, cv::Scalar(0, 0, 0));

    // Create an empty output image
    outputImage = cv::Mat::zeros(inputImage.size(), inputImage.type());

    // Perform convolution
    for (int i = paddingHeight; i < paddedImage.rows - paddingHeight; ++i) {
        for (int j = paddingWidth; j < paddedImage.cols - paddingWidth; ++j) {
            double sumB = 0;
            double sumG = 0;
            double sumR = 0;
            for (int m = -paddingHeight; m <= paddingHeight; ++m) {
                for (int n = -paddingWidth; n <= paddingWidth; ++n) {
                    sumB += paddedImage.at<cv::Vec3b>(i + m, j + n)[0] * kernel[m + paddingHeight][n + paddingWidth][0];
                    sumG += paddedImage.at<cv::Vec3b>(i + m, j + n)[1] * kernel[m + paddingHeight][n + paddingWidth][1];
                    sumR += paddedImage.at<cv::Vec3b>(i + m, j + n)[2] * kernel[m + paddingHeight][n + paddingWidth][2];
                }
            }
            outputImage.at<cv::Vec3b>(i - paddingHeight, j - paddingWidth)[0] = cv::saturate_cast<uchar>(sumB);
            outputImage.at<cv::Vec3b>(i - paddingHeight, j - paddingWidth)[1] = cv::saturate_cast<uchar>(sumG);
            outputImage.at<cv::Vec3b>(i - paddingHeight, j - paddingWidth)[2] = cv::saturate_cast<uchar>(sumR);
        }
    }
}This C++ implementation of convolution utilizes the OpenCV library to efficiently apply convolution to color images. It also handles padding and ensures that the output image has the same dimensions as the input.
Creating a Synthetic Depth Map
In the realm of computer vision and image processing, depth maps serve as invaluable tools for simulating the depth of a scene or image. These depth maps are pivotal for various applications, including the creation of visually stunning effects like the Depth of Field (DOF) bokeh effect. In this section, we embark on an exploration of crafting synthetic depth maps. This process will be demonstrated using both Python and C++.
Python Implementation
Our journey into creating a synthetic depth map using Python commences with the following steps:
- Initialization: The journey starts by laying the foundation—an empty depth map is initialized. This depth map mirrors the dimensions of the input image and is represented as a NumPy array of the
uint8data type, which typically spans the range of 0 to 255. - Depth Values: The second waypoint involves the definition of two distinct depth values—one for the foreground and the other for the background. These values will ultimately govern the depth perception encapsulated within the resultant depth map. For our illustrative purposes, we prescribe
foregroundDepthas 100 andbackgroundDepthas 255. - Foreground Region: To bestow a sense of depth, we designate a region at the heart of the image as the foreground. In this instance, we conjure a circular region, residing serenely within the middle of the image. This region is symbolic of objects that inhabit proximate quarters to the observer and, consequently, possess a shallower depth (
foregroundDepth). - Background Region: The remaining swathes of the depth map’s territory are allotted to the background. In our example, we ascribe the depth value of all pixels within this domain to be equivalent to
backgroundDepth.
# Function to create a synthetic depth map
def createDepthMap(image):
    depthMap = np.zeros(image.shape[:2], dtype=np.uint8)

    # Define the depth values for foreground and background
    foregroundDepth = 100
    backgroundDepth = 255

    # Define the region as foreground (center of the image)
    centerX = image.shape[1] // 2
    centerY = image.shape[0] // 2
    rectWidth = image.shape[1] // 4
    rectHeight = image.shape[0] // 4

    # Set the circular region as foreground
    cv2.circle(depthMap, (centerX, centerY), rectWidth, foregroundDepth, -1)

    # Set the remaining region as background
    depthMap[depthMap == 0] = backgroundDepth

return depthMapAs a result of these meticulous endeavors, the resultant depth map is emblematic of a seamless gradient—an elegant transition that ushers viewers from the foreground (where depth is more perceptible) to the background (where depth subsides).
C++ Implementation
The C++ implementation of depth map creation mirrors the Python approach in essence but harnesses the power of OpenCV to orchestrate the orchestration. Here’s a deconstruction of the C++ code:
- Initialization: Just like in Python, we take our initial step by initializing a blank canvas—our depth map (
depthMap). This depth map shares the same dimensions as the input image and is represented ascv::Matwith an 8-bit unsigned integer data type (CV_8U). - Depth Values: In harmony with our Python counterpart, we christen
foregroundDepthandbackgroundDepthto determine the depth values for the foreground and background regions. - Foreground Region: Our expedition to craft the foreground region begins by invoking the
cv::circlefunction. This function is tasked with sketching a filled circle situated snugly at the heart of the image. This circle serves as a representation of objects that grace the immediate vicinity of the observer, hence being adorned withforegroundDepthvalue. - Background Region: The surrounding expanse, encompassing the circular foreground region, is the canvas for the background. To this canvas, we impart the depth value of
backgroundDepthusing thecv::rectanglefunction.
/ Function to create a synthetic depth map
cv::Mat createDepthMap(const cv::Mat& image) {
    cv::Mat depthMap(image.size(), CV_8U);

    // Define the depth values for foreground and background
    int foregroundDepth = 100;
    int backgroundDepth = 255;

    // Define the region as foreground (center of the image)
    int centerX = image.cols / 2;
    int centerY = image.rows / 2;
    int rectWidth = image.cols / 4;
    int rectHeight = image.rows / 4;

    // Set the circular region as foreground
    cv::circle(depthMap, cv::Point(centerX, centerY), rectWidth, cv::Scalar(foregroundDepth), -1);

    // Set the remaining region as background
    cv::rectangle(depthMap, cv::Rect(0, 0, image.cols, image.rows), cv::Scalar(backgroundDepth), -1);

    return depthMap;
}Just like the Python counterpart, the depth map gradually transitions from the foreground to the background, offering an immersive representation of depth that can be harnessed for subsequent image processing endeavors.
Applying Depth of Focus Gaussian Blur Filter
Our journey through the creation of a captivating Depth of Field (DOF) bokeh effect reaches its zenith as we unveil the application of a Depth of Focus Gaussian Blur Filter. This filter adds the final layer of depth and realism to our image, bringing the foreground into sharp focus while gently blurring the background, just as a high-quality camera lens would.
Python Implementation
The implementation of this filter begins with the creation of a Gaussian blur kernel. This kernel defines the blurring behavior we desire for our DOF effect. Python allows us to achieve this with elegance and simplicity.
- Gaussian Blur Kernel: We define a custom function,
gaussian_blur_kernel, to generate the Gaussian blur kernel. The kernel’s size and sigma (standard deviation) are specified to control the extent of the blur. The kernel is constructed using a mathematical function that embodies the Gaussian distribution. - Applying Depth-Based Blur: Armed with our Gaussian blur kernel, we proceed to apply the depth-based blur to our image. The size of the kernel is determined by the
blurAmount, which signifies the desired intensity of the blur.
# Function to create a Gaussian blur kernel
def gaussian_blur_kernel(size, sigma):
    kernel = np.fromfunction(
        lambda x, y: (1 / (2 * np.pi * sigma ** 2)) * np.exp(-((x - size // 2) ** 2 + (y - size // 2) ** 2) / (2 * sigma ** 2)),
        (size, size)
    )
    return kernel / np.sum(kernel)

# Function to apply a depth-based blur
def applyDepthBlur(input_image, depthMap, blurAmount):
    # Create a Gaussian blur kernel with the specified blurAmount
    kernel_size = 2 * blurAmount + 1
    sigma = blurAmount / 2.0
    gaussian_kernel = gaussian_blur_kernel(kernel_size, sigma)

    # Apply the Gaussian blur using the custom convolution function
return custom_convolution(input_image, gaussian_kernel)The result is an image that captures the DOF bokeh effect, where objects in the foreground stand out in sharp focus while the background gently recedes into a pleasing blur.
C++ Implementation
Transitioning to C++, we harness its performance and efficiency to apply the Depth of Focus Gaussian Blur Filter.
- Gaussian Kernel Creation: In C++, we begin by creating a Gaussian blur kernel for blurring our image. The kernel size and sigma, which controls the extent of blur, are provided.
- Kernel Filling: We fill the Gaussian kernel with values calculated based on the Gaussian distribution formula. These values ensure that the blur effect is applied as desired.
- Kernel Normalization: To ensure the kernel’s integrity, we normalize it by dividing each element by the sum of all kernel elements.
- Depth-Based Blur Application: Finally, we apply the depth-based blur to our image using the convolution operation. This creates the DOF bokeh effect, rendering the foreground in sharp focus and the background in a delightful blur.
// Function to apply a depth-based blur
void applyDepthBlur(const cv::Mat& inputImage, const cv::Mat& depthMap, cv::Mat& outputImage, int blurAmount) {
    // Create a Gaussian kernel for blurring
    std::vector<std::vector<std::vector<double>>> kernel(2 * blurAmount + 1, std::vector<std::vector<double>>(2 * blurAmount + 1, std::vector<double>(3, 0.0)));

    // Fill the Gaussian kernel
    double sigma = blurAmount / 2.0;
    double sum = 0.0;
    for (int i = -blurAmount; i <= blurAmount; ++i) {
        for (int j = -blurAmount; j <= blurAmount; ++j) {
            double value = exp(-(i * i + j * j) / (2.0 * sigma * sigma)) / (2.0 * CV_PI * sigma * sigma);
            kernel[i + blurAmount][j + blurAmount][0] = value;
            kernel[i + blurAmount][j + blurAmount][1] = value;
            kernel[i + blurAmount][j + blurAmount][2] = value;
            sum += value;
        }
    }

    // Normalize the kernel
    for (int i = 0; i < 2 * blurAmount + 1; ++i) {
        for (int j = 0; j < 2 * blurAmount + 1; ++j) {
            kernel[i][j][0] /= sum;
            kernel[i][j][1] /= sum;
            kernel[i][j][2] /= sum;
        }
    }

    // Apply convolution with the Gaussian kernel based on the depth map
    convolution(inputImage, kernel, outputImage);
}The result is an image imbued with the captivating Depth of Field bokeh effect, a testament to the power of image processing techniques and custom convolution functions.
With this final touch, our journey through the creation of a DOF bokeh effect is complete. We’ve explored the intricacies of convolution, synthesized depth maps, and applied Gaussian blur filters, all within the realm of custom image processing. Our image now bears the hallmark of professional photography, showcasing the subject in pristine clarity against a softly blurred background—a true work of art.
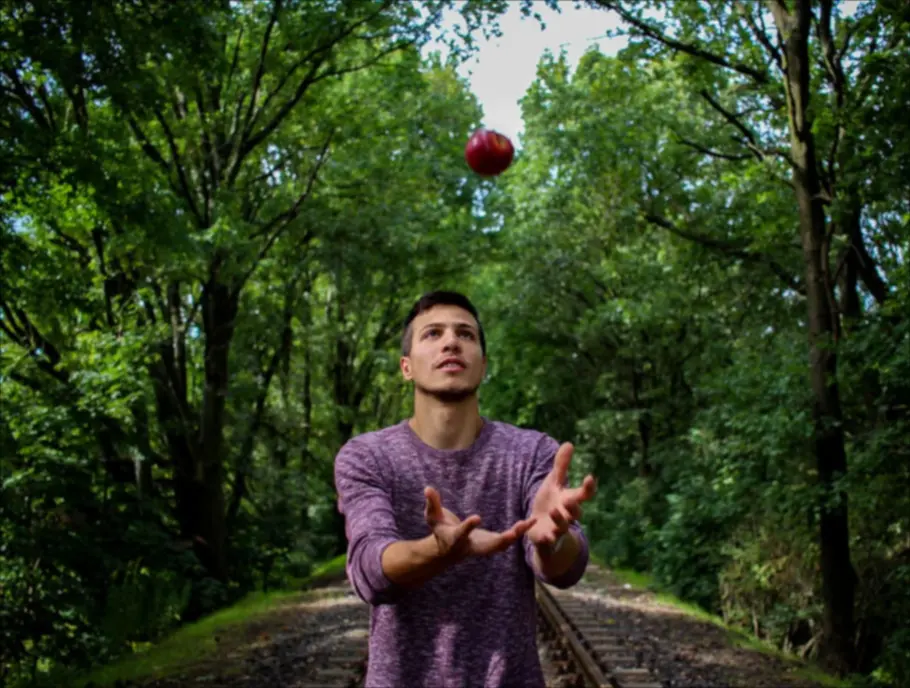
Visual Results: Bokeh in Focus
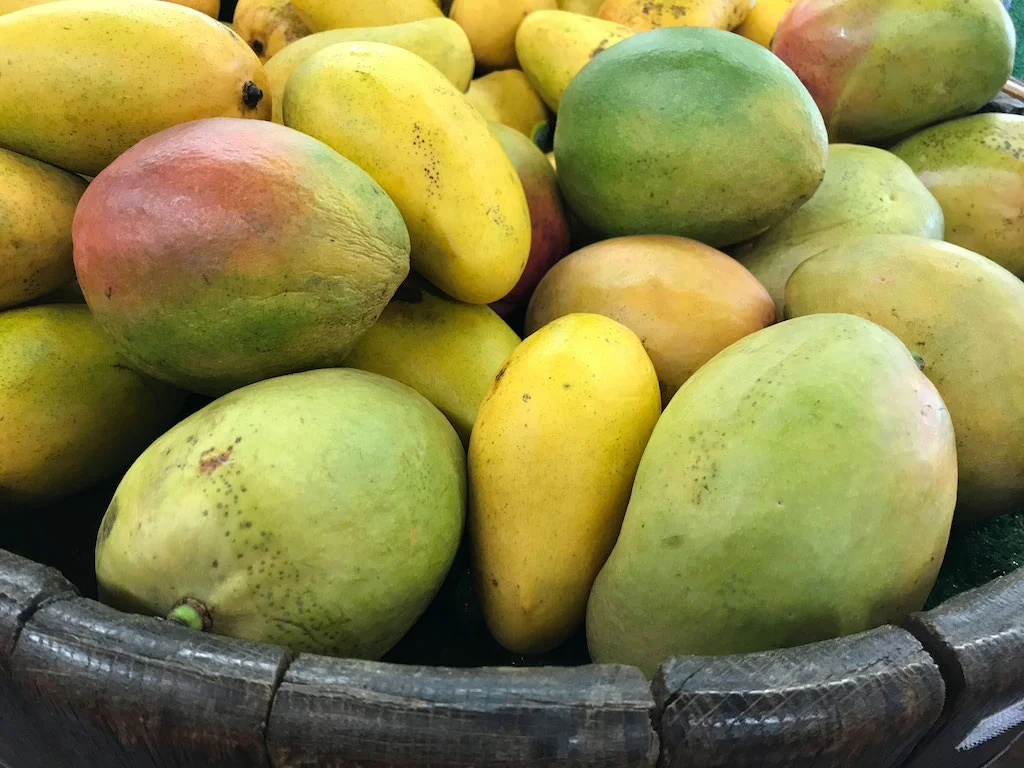
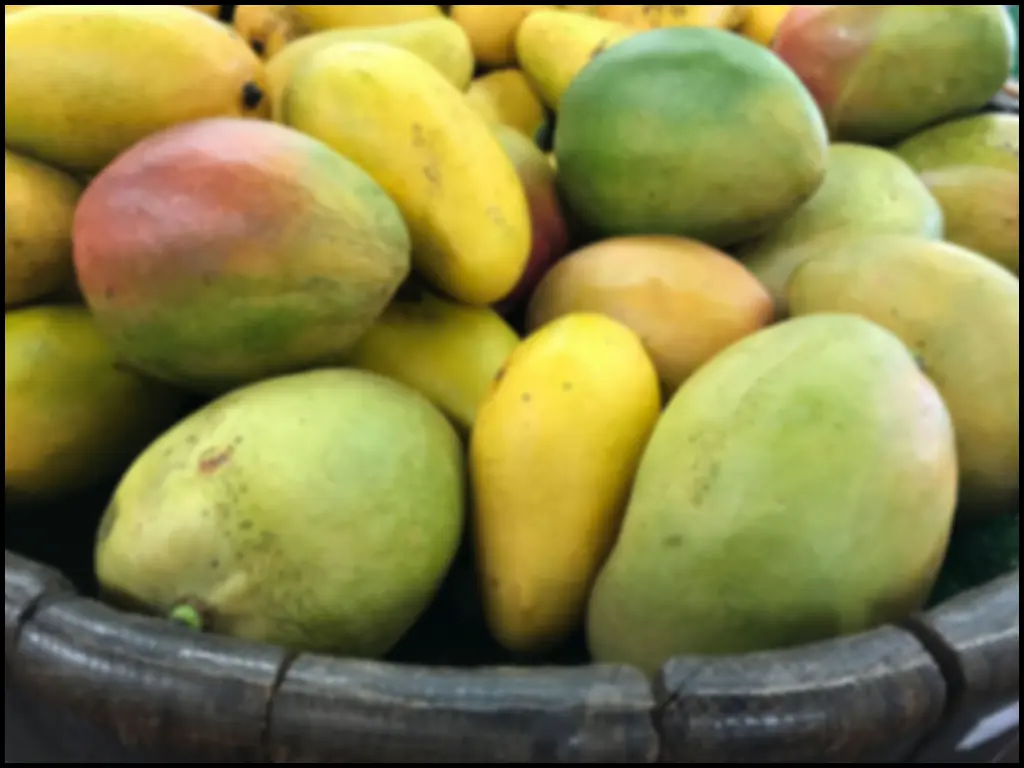
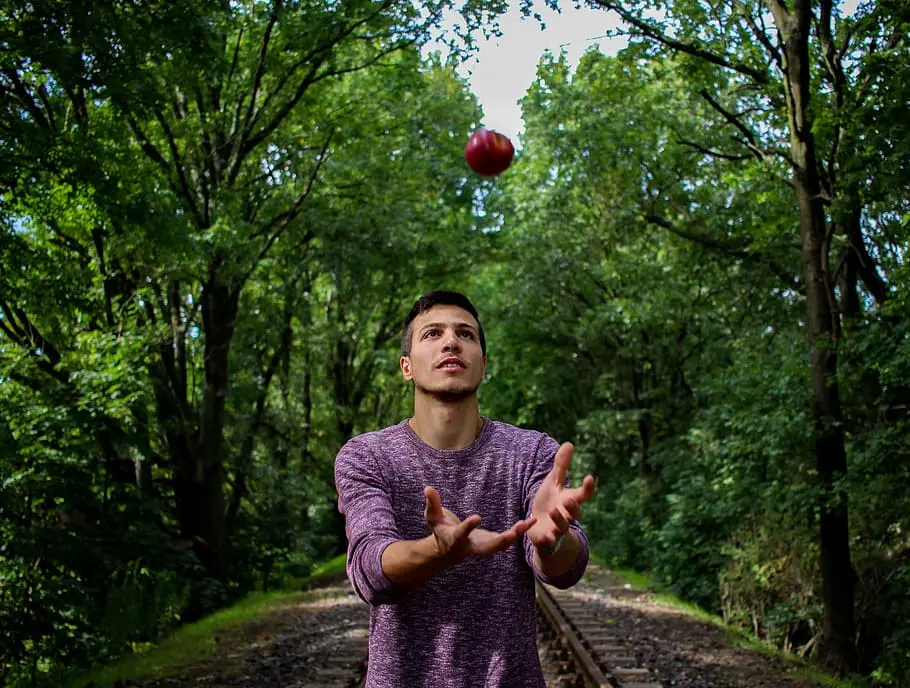


Conclusion
In the realm of computer vision and image processing, we’ve embarked on a journey to create stunning Depth of Field (DOF) bokeh effects from scratch. Through a fusion of mathematical convolution, the art of depth map creation, and the finesse of Gaussian blur filters, we’ve transformed ordinary images into captivating works of art.
Our exploration began with the foundational concept of convolution. We dived deep into the mechanics of this mathematical operation, both in Python and C++, unearthing the beauty of custom convolution functions. These functions, designed with precision, enabled us to manipulate pixel values and apply filters with finesse.
With convolution as our guide, we ventured into the realm of depth maps. We learned how to synthesize these essential elements that mimic real-world depth perception. By defining regions of focus and blur, we created a roadmap for our images to follow.
The grand finale of our journey was the application of a Depth of Focus Gaussian Blur Filter. With painstakingly crafted Gaussian blur kernels, we brought our images to life. Objects in the foreground leaped into sharp focus, while the background embraced a graceful blur—just like high-quality photography.
As we conclude this odyssey, we reflect on the power and artistry of image processing. With a dash of mathematics, a touch of programming, and a keen eye for detail, we’ve unlocked the secrets behind professional-quality DOF bokeh effects.
The road to image mastery is one of continuous learning and experimentation. Armed with the knowledge acquired on this journey, you’re poised to explore new horizons in computer vision, perhaps crafting your own unique effects and pushing the boundaries of what’s possible in the world of visual storytelling.
So, go forth with your newfound expertise and create images that captivate, inspire, and transport viewers to a world where every detail matters and every pixel tells a story.
Download The Code
Kindly subscribe to Visual AI Blog to access the source code for our blog. Rest assured, we respect your privacy and won’t inundate your inbox with unnecessary emails.
Author Biography

Ritik Bompilwar is an AI enthusiast. With a deep interest in the field of Artificial Intelligence and Computer Vision, Ritik enjoys exploring the latest advancements in technology and sharing knowledge with the community. When not immersed in coding or researching, you can find him pursuing his love for Photography and Visual Arts. Ritik is dedicated to making complex concepts accessible and helping others learn and grow in the world of Visual AI.

